Archive | Reader Request RSS feed for this section

Reader Request: Can You Thin Nail Polish?

19 Sep

Happy Monday, friends! Fall has fallen upon us, meaning I’ve really started to bust out the dark nail polishes – and so have my friends! That means a pertinent nail polish question for the ages comes into play.

Sara asked: Can you thin nail polish? My nice dark colors from last year are all goopy and sticky. So’s my Seche Vite.

You certainly can! Here’s my advice to making sure your polish stays as spreadable as the day you bought it.

  1. Store your nail polish in a cool, dark place. I recommend keeping it in a Tupperware in your closet – out of direct sunlight and away from radiators or anything of the sort is the key!
  2. Make sure the cap is screwed on tightly. This may seem like a no-brainer, but you’d be surprised how often I find that an occasional bottle is slightly open – this makes the polish thick and gunky.
  3. Are the contents separated? This doesn’t mean the polish is no good – roll the bottle between your palms until the colors are blended. Don’t shake! This will cause bubbles in the bottle that will show up on your nails.

If you’re having difficulty doing your manicure because your lacquer has already reached that level of maple syrup thickness on your nails, here’s how you can thin out the texture of your nail polish:

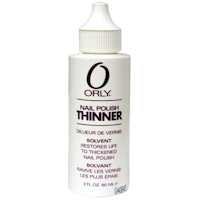
Orly Nail Polish Thinner

Orly Nail Polish Thinner (sallybeauty.com)

DON’T add nail polish remover, though you may have heard this is how to fix your old nail polish. It’s not – it’ll destroy your nail polish, which is bad news for that limited edition color that was so hard to come by. DO, however, add a nail polish thinner, which is specially made for this. Add one drop at a time and then check your progress, because you can always add more – you can never go back! Try this one by Orly – remember, a little goes a long way!

Ahh, the Achilles heel of Seche Viteit gets super thick and very difficult to apply after a few months. I usually just bite the bullet and buy a new bottle after a while, even though it’ll set me back about $7. However, the makers of Seche also have a product called Restore, which does exactly what it says – restores the topcoat. I’m not totally convinced that it brings Seche back to its original greatness, however, which is why I usually just end up purchasing a new bottle. You can check out Restore here on drugstore.com.

Happy painting! Thank you, Sara, for the great question!

Reader Request – How To: Take It Off

3 Aug

Good afternoon, everyone! I got a great reader request, so I’m pushing a few other posts aside so I can respond.

Jackie asked: It’s a giant pain to remove glitter polish – I practically have to scrub my nails off. Any recommendations?

This is an awesome question, and something that took me an embarrassingly long time to figure out. While I admittedly try to wear glitter polishes less frequently because of the removal process, these tips should make things easier.

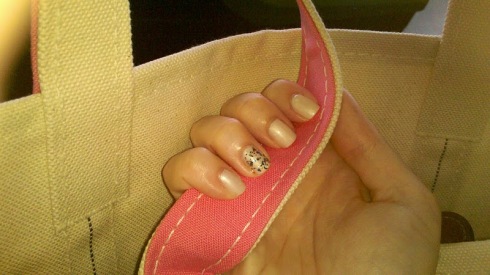
  1. Apply your glitter polish over another polish, such as a creme or a jelly. Not only will this make it easier to remove your glitter coat, it can add some dimension to your look. While many glitter polishes are intended to be thickly applied, some are not, and benefit from a different color beneath. Below is a picture of Deborah Lippmann‘s Happy Birthday (on ring finger only) over Essie‘s East Hampton Cottage. You can see the Essie shade underneath the glitter – I think it gives a little somethin’ somethin’ to an otherwise typical manicure.
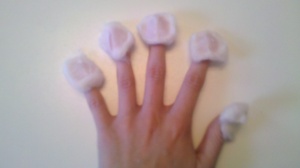
  2. Essie East Hampton Cottage Nail Polish and Deborah Lippmann Happy Birthday Nail PolishSo you want to take it off? Okay. (It WILL take you longer than your average polish removal, but I’ve found this process cuts back on time.) Now is not the time to be stingy with cotton balls – though I often play “how few can I use?” when I usually take off my polish! One per finger at LEAST is my suggestion. Using acetone-based nail polish remover, soak a cotton ball and apply it to your nail. Don’t start removing yet! Press the ball to your nail and LEAVE IT. Do this for each finger on that hand. (The manicure that I’m demonstrating with was not done over a base color.) When you’re done, it should look something like this:
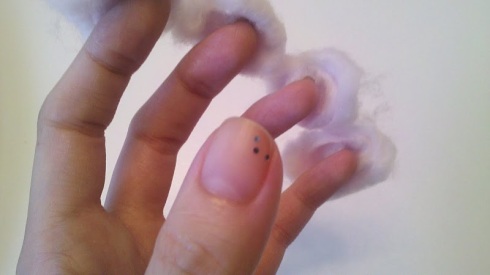
  3. Glitter Nail Polish RemovalNow that you look like some sort of cotton-claw monster, let that sit for at least thirty seconds. Really. When you’re ready, press your cotton ball firmly to your nail and rock it from side to side horizontally to ensure that the acetone is really doing its job. Then push the ball straight off your nail. A lot of the glitter should have come off, but if it’s not all gone, don’t worry – use the other side of the same puff and only remove in one direction, instead of scrubbing up and down. Glitter is not so gentle on the nails (not to mention it will try to stick to everything). Here’s what my nail looked like after using this technique:
  4. Glitter Nail Polish Removal Step Two(Not bad, right? I’ve found that clusters of big pieces like these tend to cling on more than little flakes of glitter. You can come back to this one later with a clean cotton ball.) Carry on with your removal process. It’ll take about fifteen minutes. When you’re done, tend to your nails with a nail buffer – the surface may be scratched from those huge chunks of glitter, which will not benefit any future manicures.

I hope that helped you, Jackie, and anyone else who loves glitter! A glitter addiction is hard to break, but with these steps you don’t have to give it up. What are everyone’s favorite glitter polishes?

Disclosure: I purchased all polishes myself.